


- First Steps Checklist
-
Frequently Asked Questions
-
All About Features
- How to Install the Tracking Code
-
User Guides
-
Integrating With Other Platforms
-
Legal, Data Privacy & Certificates
- TWAIA Addendum
- Glossary
- Contact
Custom Domains Setup Guide
Overview
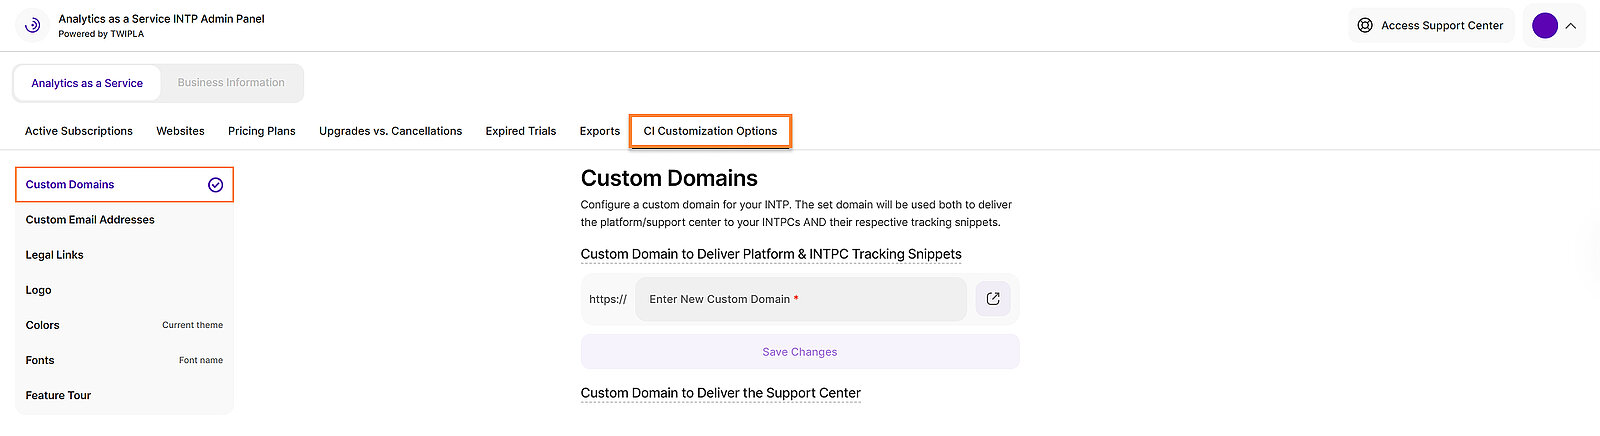
This guide outlines the steps required to set up custom domains via which the integrated platform, your INTPCs' tracking snippets and the support center should be delivered. Furthermore, you can define a custom domain to be used for any email communication happening between the integrated platform and your INTPCs.
By following the steps shown below, you can fully brand and optimize your environment:
Access Custom Domain Settings

To begin the configuration, follow these steps:
- Log in to the INTP Admin Panel using your admin credentials here.
- Navigate to CI Customization Options > Custom Domains & Custom Email Addresses.
Custom Domain to Deliver Platform & INTPC Tracking Snippets
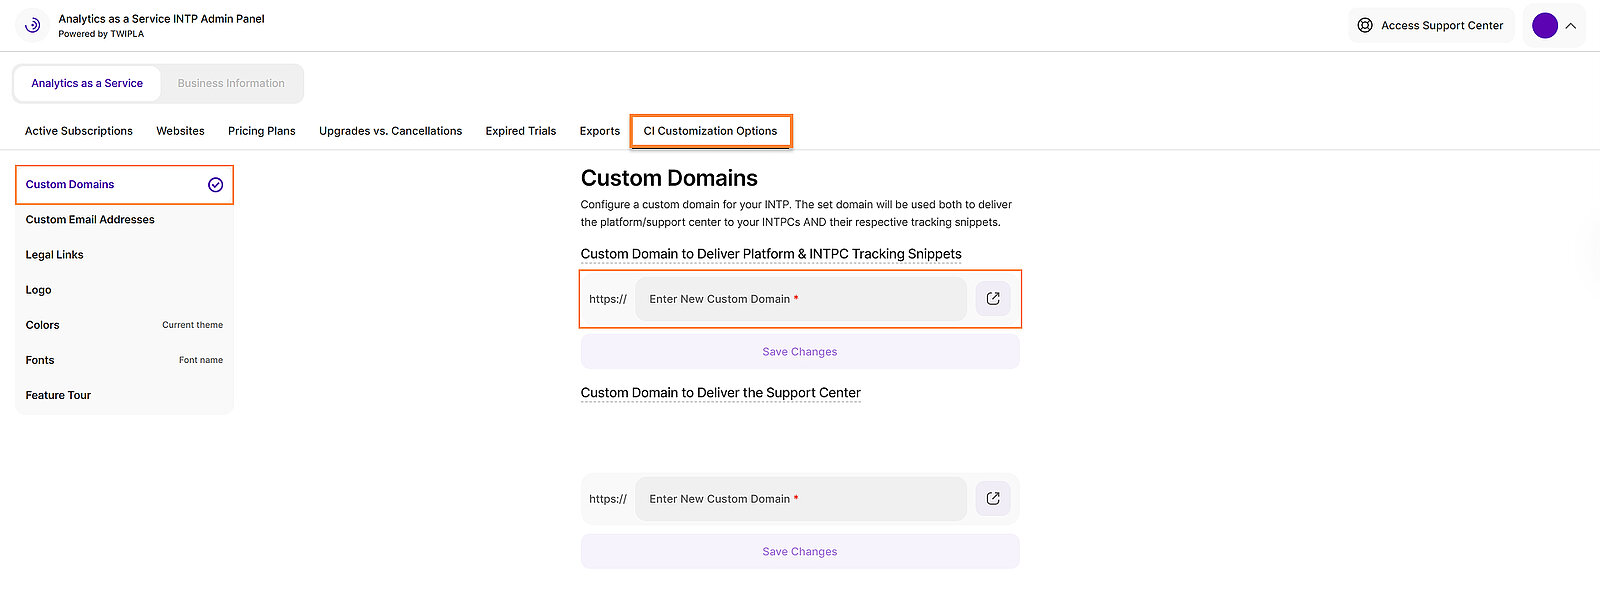
This is your primary INTP domain. It replaces the default TWIPLA domains and is used to:
- Deliver the dashboard
- Serve tracking snippets
- Help prevent traffic loss caused by ad blockers
Setup Steps
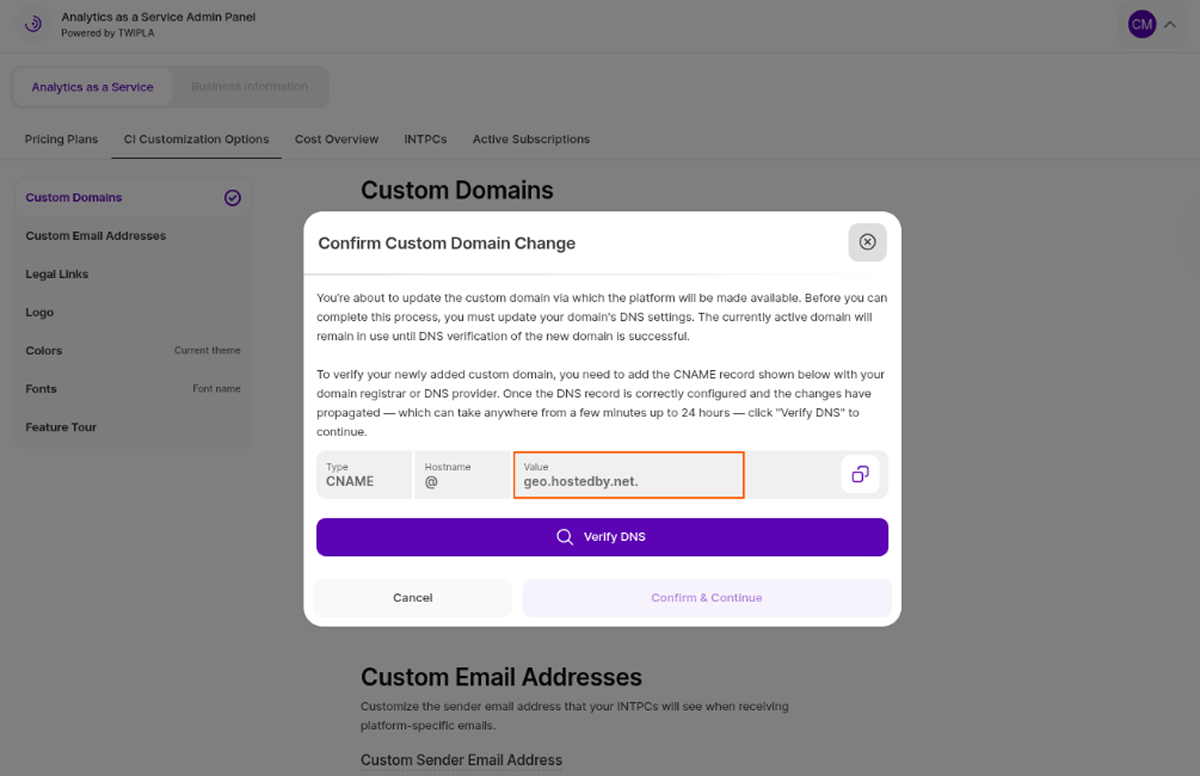
In this example, the test domain used is: wpe-platform.demo.twiplatest.com
(You must use your own real domain.)
- Enter the domain (e.g., platform.yourdomain.com) and click Save Changes.
- A modal with details on what DNS Record you need to configure is displayed.
- You need to set up a CNAME record pointing to geo.hostedby.net.
- Click Verify DNS to confirm that the record has been added correctly. Please note that propagation can take anywhere from a few minutes to several hours.
- After the domain is verified, click Confirm & Continue until the modal closes.
- Processing Status
The domain will enter a Pending state. During this time, the SSL certificate is generated and the CDN is configured. This process can take from a few minutes up to one hour. - Once everything is ready, the status will change from Pending to Active and the new domain is ready for use.
Key Implications of the Platform Domain Change
At this point the websites tracking snippets should successfully be updated to use the updated domain.
{
"visaTrackingCode":"<!-- Tracking Code for twiplatest.com--><script>(function(v,i,s,a,t){v[t]=v[t]||function(){(v[t].v=v[t].v||[]).push(arguments)};if(!v._visaSettings){v._visaSettings={}}v._visaSettings[a]={v:'1.0',s:a,a:'1',t:t};var b=i.getElementsByTagName('body')[0];var p=i.createElement('script');p.defer=1;p.async=1;p.src=s+'?s='+a;b.appendChild(p)})(window,document,'wpe-platform.demo.twiplatest.com/analytics/main.js','bf8e164d-4c41-11f0-a7ae-960004340fd3','va')</script><!-- Tracking Code for dumi3_website -->"
}
The analytics dashboard can now be accessed via this new domain. For details on creating the dashboard URL, refer to our full guide here.
“https://wpe-platform.demo.twiplatest.com?intpc_token=?&externalWebsiteId=?”
Custom Domain to Deliver the Support Center
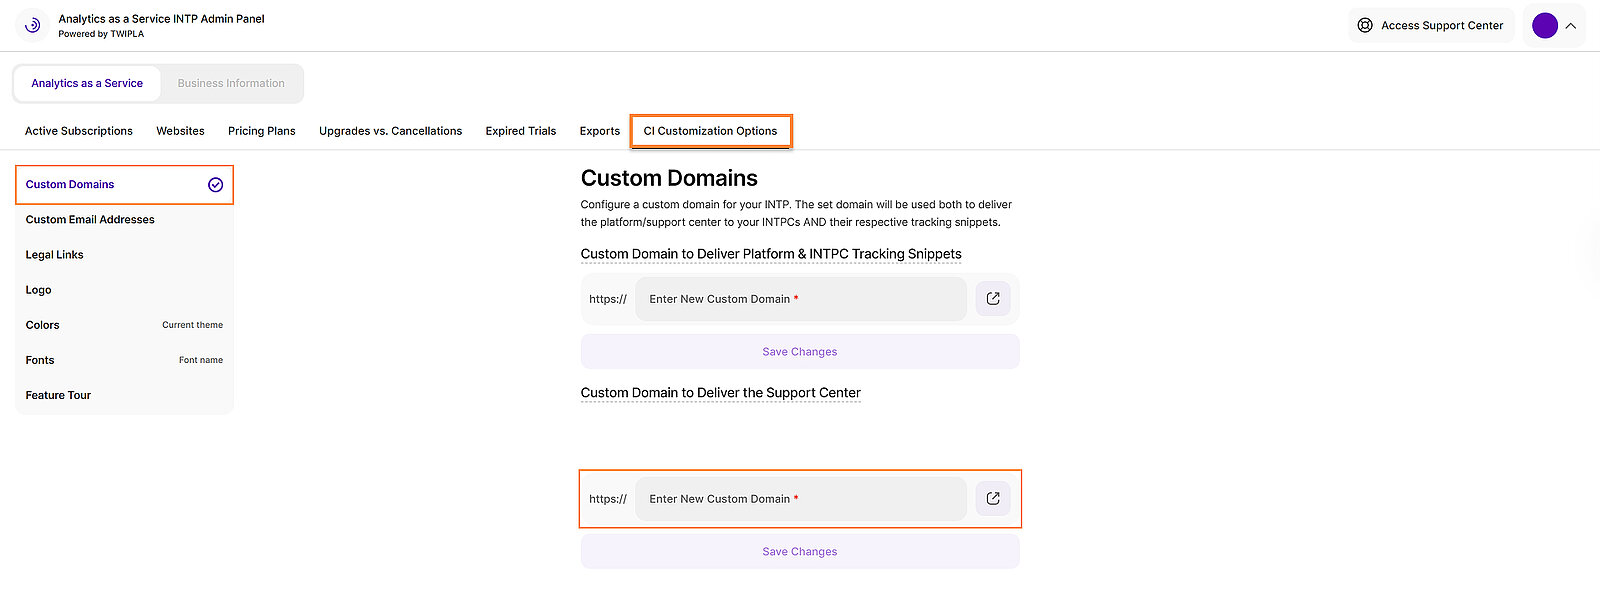
This is the custom domain that will be used to serve the white-labeled TWIPLA support center. The respective support center URL will appear throughout the analytics dashboard (e.g. within tooltips that the INTPC opens).
Setup Steps
The setup process is exactly the same as the one used to set up a custom domain to deliver the platform described above:
- Please use a different domain than the one used for the platform (e.g., support.yourdomain.com). Nevertheless, the same DNS setup is required.
- Add a CNAME record pointing to geo.hostedby.net..
Key Implications of the Support Center Domain Change
- The Support Center will be accessible via the new custom domain you have defined.
- All website’s tooltips within the analytics dashboard will be updated to point to this updated Support Center domain.
Custom Email Addresses
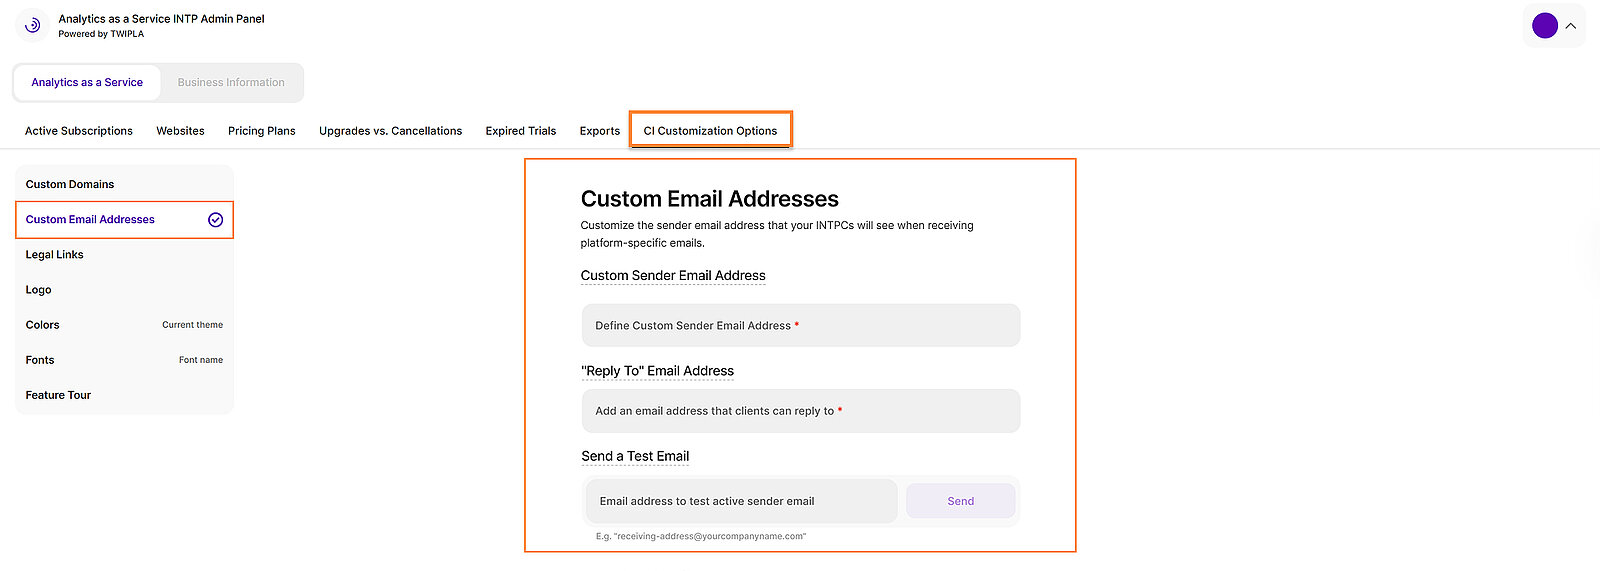
Customize the sender email address that your INTPCs will see when receiving platform-specific emails. This section includes two primary configuration settings and a dedicated tool for verifying your setup.
Custom Sender Email Address
This email address will be displayed to your clients when they receive emails from the platform. Setting it up requires adding new DNS records.
Setup Steps
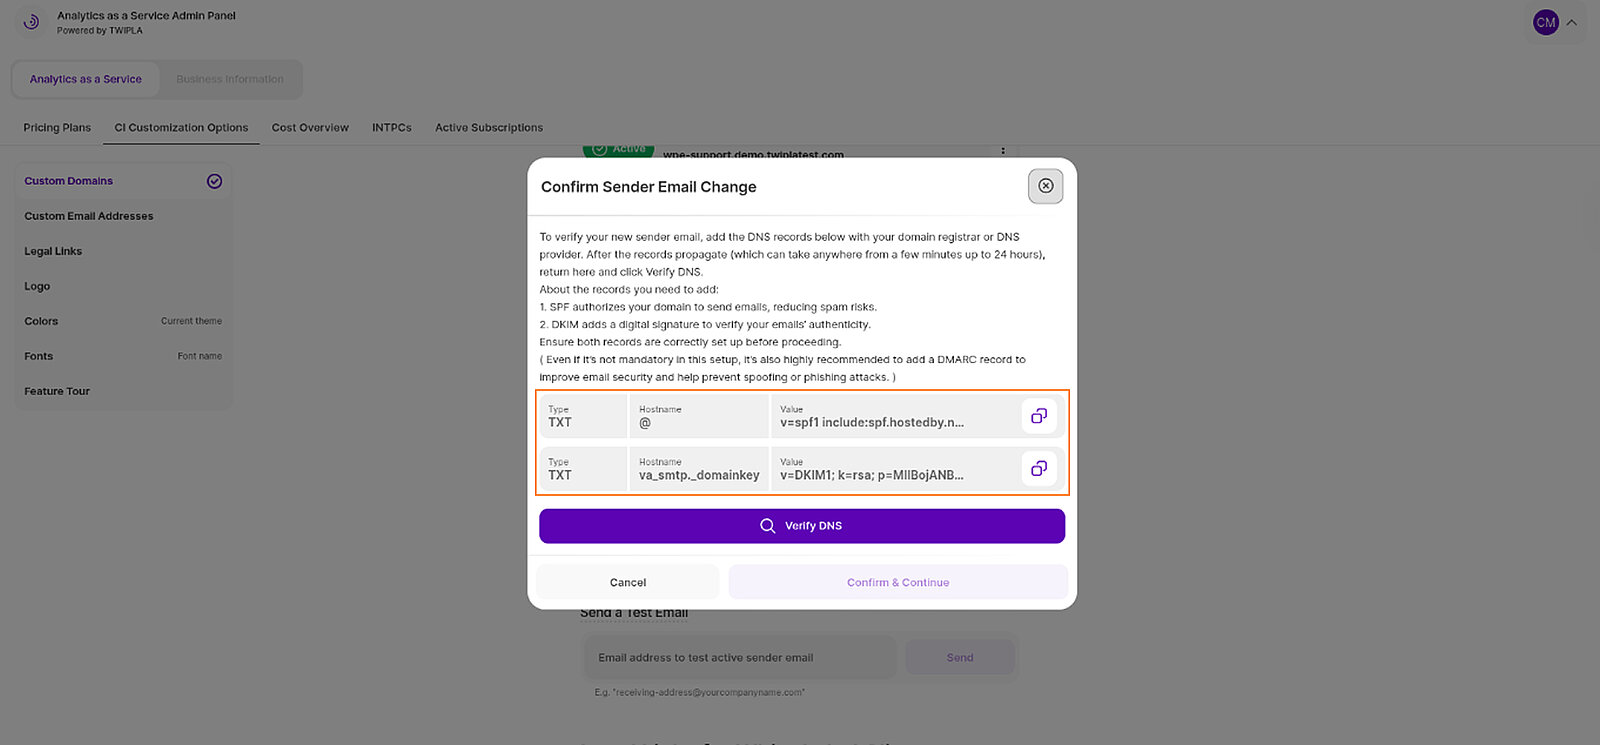
In this example, we used the following details:
- Domain: wpe.demo.twiplatest.com
- Email address: support@wpe.demo.twiplatest.com
(Make sure to use your own email domain as you follow along.)
- Enter the domain and click Save Changes.
- A modal with details on what DNS Records you need to configure and some extra information is displayed.
- Go to your DNS provider and add the required DNS records.
- Unlike the setup for the platform domain and support center, you will need to add two specific TXT records for your email domain.
- After adding the DNS records, click Verify DNS. Then click Confirm & Continue.
- Set up the Sender Name. This name will appear alongside your email address when recipients receive your emails.
- Save the changes and the email address will be ready in a few moments after our internal setup is done.
- Once everything is ready, the status will change from Pending to Active and the new email addresses are ready for use.
You can always update the address or just the sender name via the three dots menu.
"Reply To" Email Address
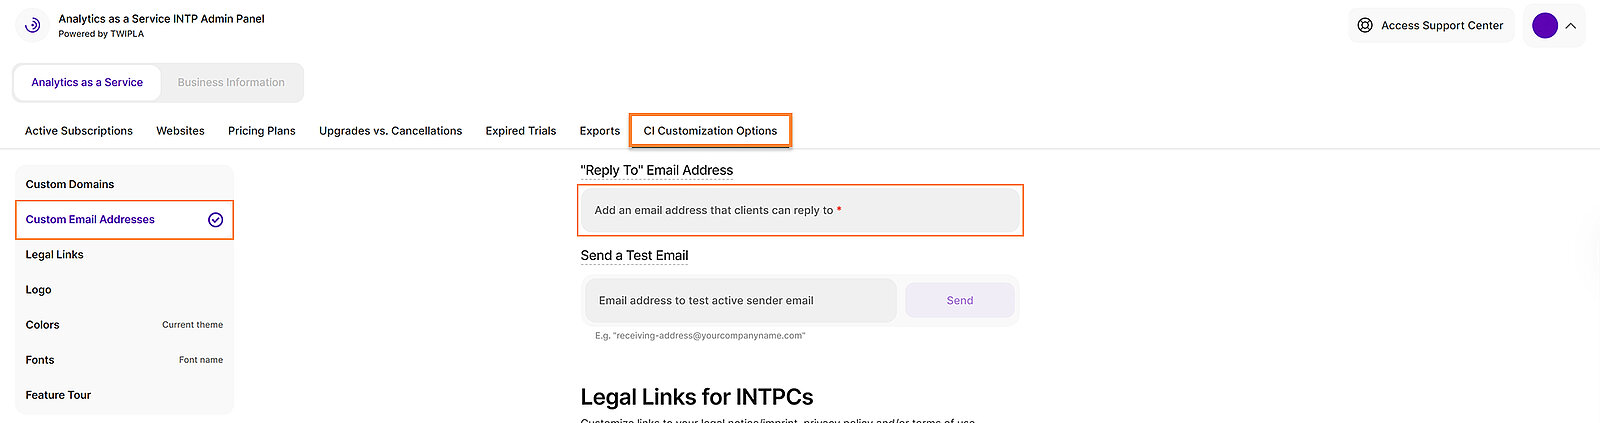
This is the auto-reply email address shown to your INTPCs when receiving platform emails. No DNS configuration is required for this setting. You can simply enter your preferred email address and click Save.
Note: This field is optional and is not required for the platform to function correctly.
Send a Test Email
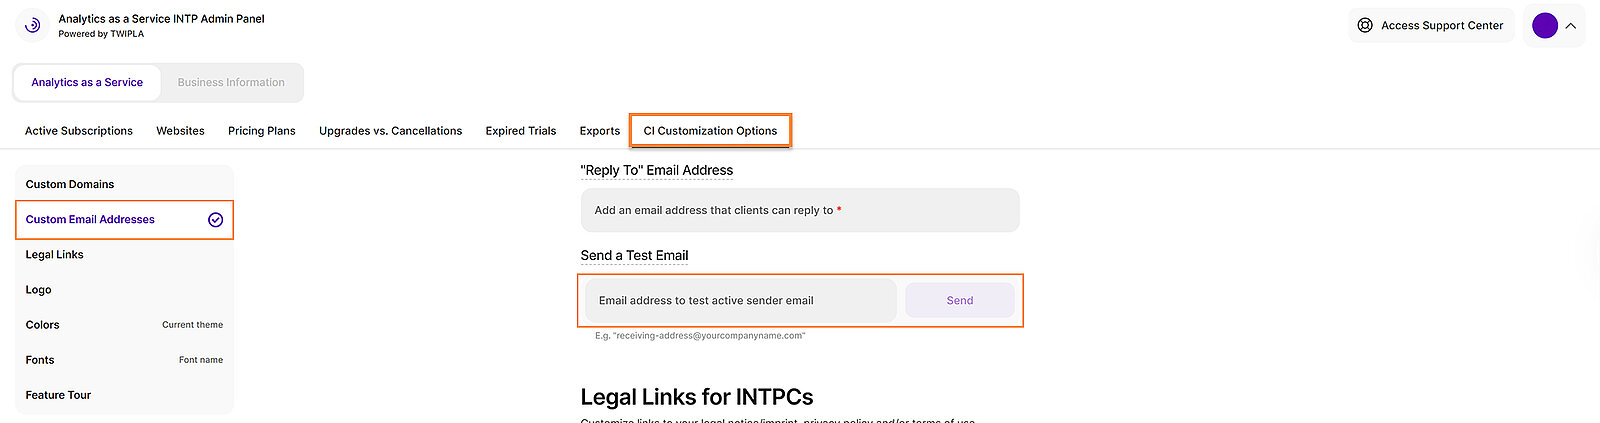
You can test how the custom sender email address appears to your clients by sending a test email. For best results, use a different email address from the one entered above. This allows you to review the email exactly as it appears from a client perspective.
- Enter a test email address in the Send a Test Email field.
- Click Send.
- Check the inbox of that account to confirm the email was delivered and formatted correctly.
Configuring Client Email Notifications
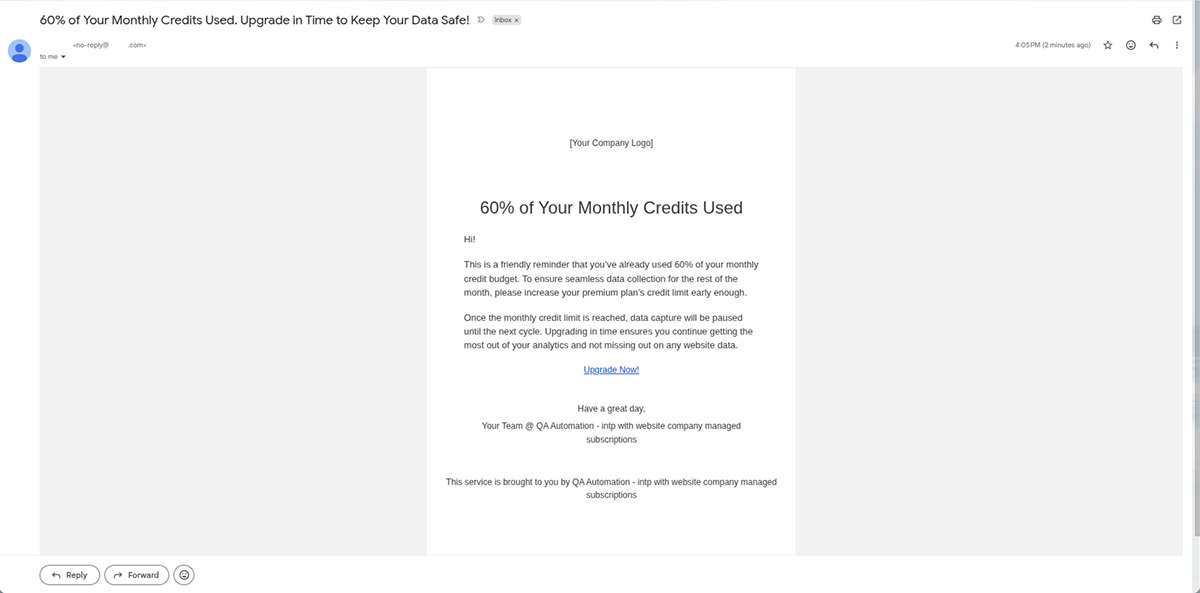
Email notifications are an essential tool for you to communicate important information, such as welcome emails and credit consumption notifications, to your clients within your very own UI and using your own texts. To ensure the right information is delivered effectively, we follow a structured process to understand and define each INTP's requirements before activating these notifications. We'll support you all the way.
Here are the steps to activate email notifications:
TWIPLA offers the following notifications that you can activate and customize for your users:
- Welcome emails (on activation)
- Free trial reminders (if you offer a free trial)
- Credit consumption notifications (based on pre-defined thresholds)
- Upgrade/downgrade existing subscription
- Cancel existing subscription
- Or any combination of the above
If free trial or credit consumption notifications should be delivered, agree on respective thresholds:
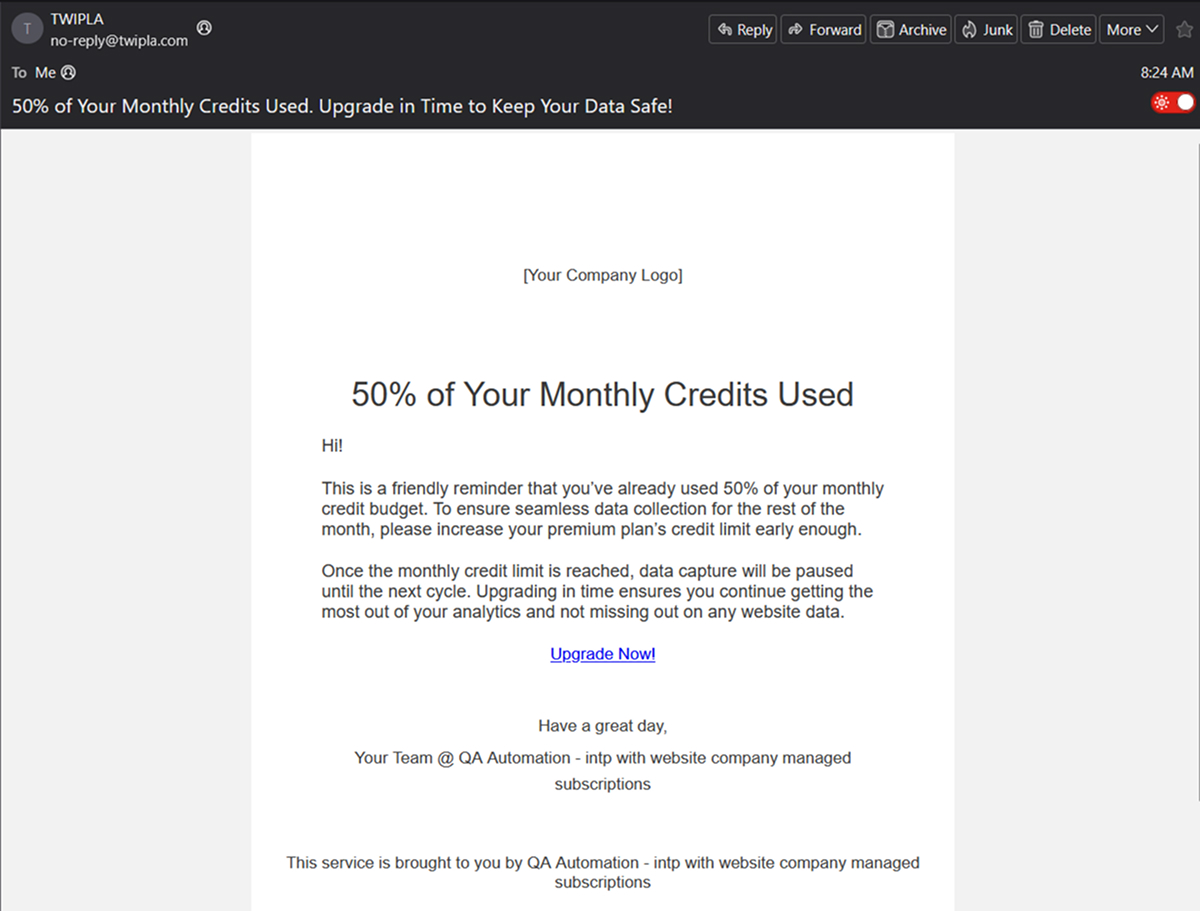
- Credit consumption: For example, your clients will be notified at 50%, 90%, and 100% of credits used. These thresholds are configurable and can be adjusted based on your clients' requirements.
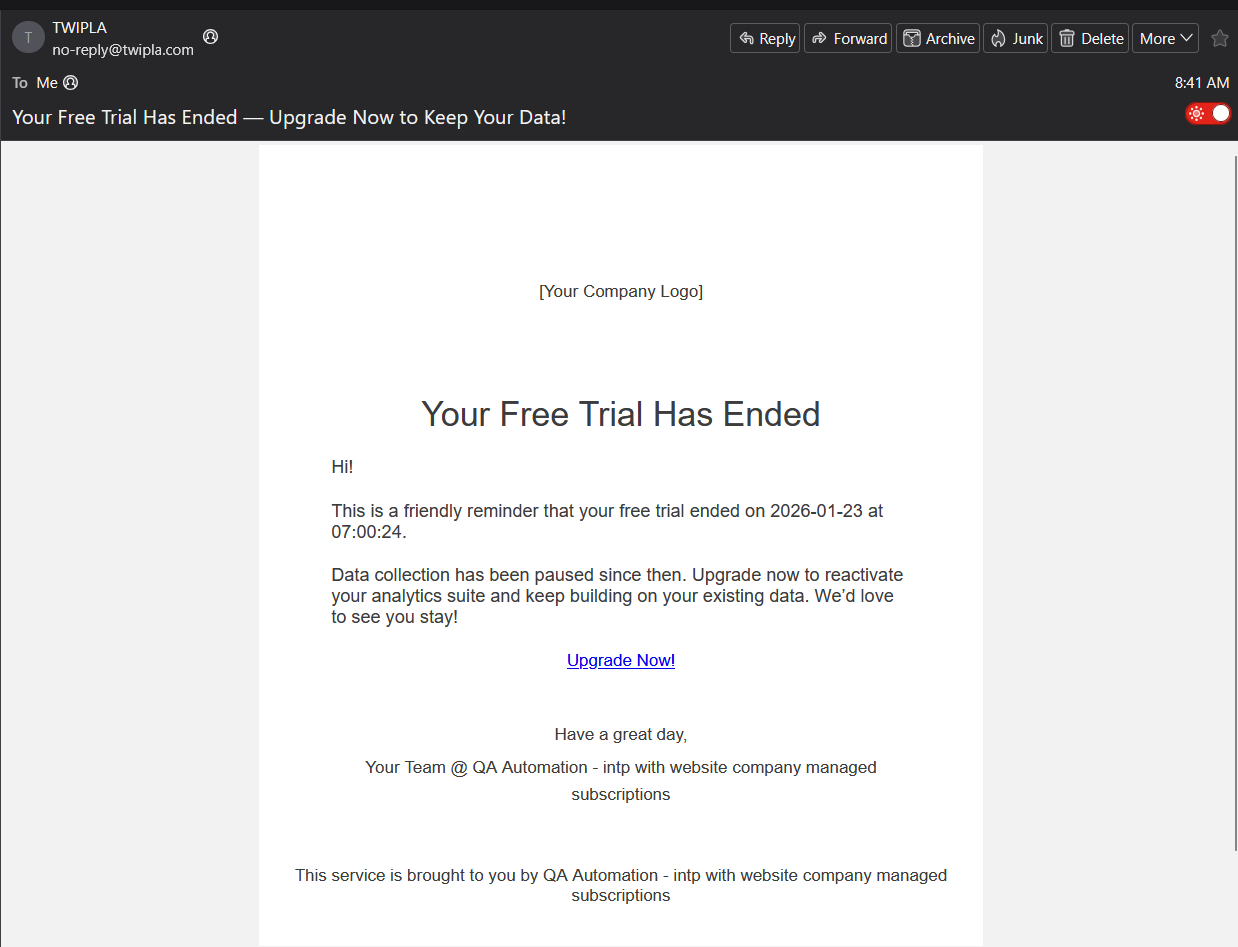
- Trial reminders: For example, when 50% of the trial period has elapsed, 1 day before the trial ends, and when the trial has expired.
Provide desired notifications' content and design; including any contained Call-to-Action (CTA) links. (e.g. Threshold notification emails typically include links to the dashboard and/or the upgrade page.)
You can provide us a HTML-file. TWIPLA also offers standard templates that can be customized.
Once you are happy with the notifications' content, you can send them to us so that we can integrate them for you.
- Configure custom sender identity: To ensure professional branding, we can configure a custom sender email address. This ensures that the notifications sent to your clients do not reference TWIPLA, keeping the communication entirely within your brand identity.
Standard Email Notification Templates
TWIPLA provides a set of standard email templates that can be customized to match your brand. You can personalize the logo, color scheme, company name, and Call-to-Action (CTA) links to create a consistent experience for your clients.
If you have your own email design, simply provide us with the HTML template, and we'll customize it for use with TWIPLA's email notifications.
Below are previews of some of the standard templates available.
Credit Consumption Thresholds Template
Free Trial Thresholds Template
Internal Email Notifications Setup
To help you monitor your clients’ monthly credit usage and prevent unexpected data loss during active subscription cycles, including the default set subscription limits, TWIPLA supports automated internal email notifications.
You can configure multiple email addresses to receive alerts whenever clients reach predefined credit consumption thresholds or free trial milestones.
Email notifications are available for two subscription models:
Account-Based Subscriptions Notifications
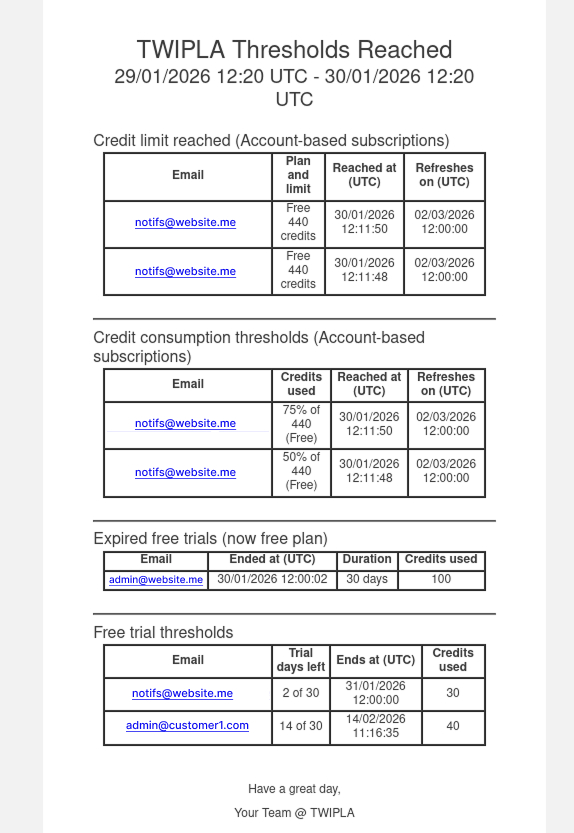
Account-based subscriptions notifications are generated once per account, regardless of how many websites belong to that account. These notifications monitor subscription status, credit usage, and free trial milestones at the account level rather than for individual websites.
Each notification email displays a title at the top (for example, TWIPLA Thresholds Reached) and includes the reporting timeframe in UTC. The email title can be customized based on your preferences, and the reporting timeframe will automatically reflect the time zone you have selected.
The email is organized into the following categories.
- Credit limit reached (Account-based subscriptions)
- Credit consumption thresholds (Account-based subscriptions)
- Expired free trials (now free plan)
- Free trial thresholds
Important Notes
- Every email includes all notification categories listed above, even when there is no new activity. If a category has no updates, it will display a message such as "No new thresholds reached."
- In addition to your internal updates, your clients will receive their own automated email notifications regarding credit consumption and free trial milestones.
Credit limit reached (Account-based subscriptions)
This notification is triggered when an account has consumed 100% of its monthly credit budget. It includes:
- Email: The email address associated with the account that reached the credit limit.
- Plan and limit: The account's current subscription plan and the total monthly credit allocation available under that plan.
- Reached at (UTC): The date and time when the account consumed 100% of its monthly credit budget.
- Refreshes on (UTC): The date and time when the monthly credit budget will automatically reset and data collection will resume for the next billing cycle, allowing data collection to resume.
Credit consumption thresholds (Account-based subscriptions)
These notifications help you monitor accounts before they exhaust their monthly credit budget. Email notifications are sent automatically whenever an account reaches a predefined credit consumption threshold.
The following are the default notification thresholds. These can be customized to meet your specific requirements.
- 60% of the monthly credit budget
- 75% of the monthly credit budget
- 90% of the monthly credit budget
Each notification includes the following information:
- Email: The email address associated with the account that reached the threshold.
- Credits used: The percentage of the monthly credit budget consumed, along with the account's total monthly credit allocation.
- Reached at (UTC): The date and time when the account reached the specified credit consumption threshold.
- Refreshes on (UTC): The date and time when the monthly credit budget will automatically reset for the next billing cycle.
Expired free trials (now free plan)
Notifications are triggered when a free trial period for an account has ended and have automatically transitioned to the Free plan. It includes:
- Email: The email address associated with the account where the free trial expired.
- Ended at (UTC): The date and time when the free trial has ended.
- Duration: The total duration of the free trial.
- Credits used: The number of credits consumed during the free trial period.
Free trial thresholds
These notifications help you identify accounts that are approaching the end of their trial period. It shows the following information:
- Email: The email address associated with the account.
- Trial days left: The number of days remaining before the free trial expires.
- Ends at (UTC): The scheduled expiration date and time of the free trial.
- Credits used: The number of credits consumed during the trial period.
Website-Based Subscriptions Notifications
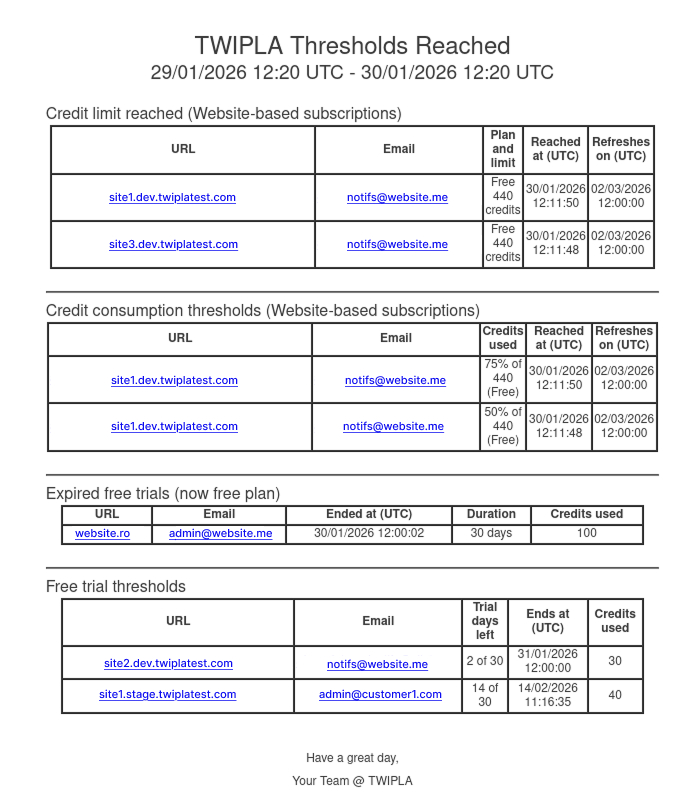
Website-based subscription notifications are generated for individual websites. Each website is monitored independently based on its own subscription plan, monthly credit allocation, and free trial status.
Unlike account-based notifications, website-based notifications evaluate each website separately, allowing multiple websites under the same account to appear as individual entries in the notification email.
Each notification email displays a customizable title at the top (for example, TWIPLA Thresholds Reached) and includes the reporting period in UTC.
It contains the same notification categories and information as Account-Based Subscription Notifications, with the addition of the URL field to identify the website associated with each event.
