
- First Steps Checklist
-
Frequently Asked Questions

-
All About Features
- How to Install the Tracking Code
-
User Guides
-
Integrating With Other Platforms
-
Legal, Data Privacy & Certificates
- TWAIA Addendum
- White Label Analytics
- Glossary
- Contact
How to Install the Tracking Code
Installing the JavaScript Snippet for Better Analytics
What is a Tracking Code?
It's a small piece of code that our analytics platform needs adding to your website's source code in order to collect and analyze data. This JavaScript snippet is unique to each site that you add to your account.
The tracking code is provided during the initial onboarding process, and whenever you start adding a new site to your account. It has to be dropped into the site's HTML - right before the closing </body> tag.
Installation will vary depending on your technical environment, including whether you have a standalone website or use a website building platform, and this page will guide you through the process.
Updated Tracking Code Options
In order to comply with privacy regulations while improving data collection, we have updated our tracking code approach. You now have access to two different tracking codes that are generated for your chosen website or that you can load for your visitors:
Option 1: NO Visitor Consent Needed for Tracking (Recommended)
We recommend this approach if you operate the platform in maximum data protection mode on a website without a cookie banner. For website visitors from countries for which you have calibrated the platform to a less strict data protection mode, data collection is limited to visitors who accept the website's cookie banner. For website visitors who have opted out, please refer to the non-consent tracking code below.
It enables the platform to collect a GDPR- and ePrivacy-compliant data set relating to session numbers and triggered website events.
This scenario can also be used for websites with a cookie consent banner that regulates data collection if the platform is set to a lower privacy mode for each visitor country (which can be set in the Privacy Center). However, only data from website visitors who have actually logged in is collected. Website visitors (the session and all actions/event triggers associated with the visitor) who have logged out are completely lost to your data set.
To also collect data from website visitors who have opted out, you should load the non-consent tracking code for these visitors (see the "Visitor consent required for tracking" tab for details).
Option 2: Visitor Consent Needed for Tracking (Platform NOT SET to Max Privacy Mode)
We recommend this approach for websites with cookie banners and with the platform running below Maximum Privacy Mode for any visitor location (so “Light”, “Medium”, or “GDPR” Privacy Mode). It enables you to collect privacy-perfect data on ALL website visitors, regardless of consent preferences. This is the right tracking code scenario if you have a cookie banner and don’t run the platform in Maximum Privacy Mode for all visitor countries of origin (something that can be calibrated in the Privacy Center). As with the Default Tracking Code, it enables the platform to collect data from visitors who accept the cookie banner in line with the privacy level set for their location.
But for those website visitors that reject non-essential technical cookies, this snippet automatically recalibrates data capture to Maximum Privacy Mode. The platform will then collect a core dataset on all website visitors who opted-out - providing you with session numbers and triggered events. So regardless of their cookie choices, no core data is lost.
Important Notes:
- You should never load both tracking codes for the same visitor at the same time. Avoid situations where you insert a tracking code generically into your HTML file and reload it via a cookie management platform or similar.
- You do not need to change or reinstall the tracking code snippet if you adjust the data protection level of your website. This applies regardless of whether you switch from a higher data protection level, such as “Maximum Privacy”, to a lower one, such as “Medium Privacy”, or vice versa.
- Changing from “Maximum Privacy” mode to a lower level requires the addition of a website cookie banner, as visitor consent is now required for data collection
- If a website visitor chooses to neither opt-in or opt-out then no snippet is loaded and no sessions or events are captured.
Customize Domain in Tracking-Code

When setting up a custom domain for your website's tracking snippet, there are 3 options available.
- Use the same domain as your website (best practice)
- Use a sub-domain of your website
- Use a completely different domain than your website (default setting provided by platform)
A more detailed overview of the options mentioned can be found in the following table:
| Same Domain as your Website (best practice) | Subdomain of Your Website / Different Domain Than Default | Default Domain for Snippet | |
| Example Domain? | www.your-website-domain.com/analytics | analytics.your-website-domain.com | visits.visitor-analytics.io |
| Impact of ad blockers used by website visitors? | The platform has full access to all visits. This approach prevents the effect of ad blockers used by website visitors, ensuring that all traffic is captured. | The platform has full access to all visits. This approach prevents the effect of ad blockers used by website visitors, so that all traffic is recorded—however, there may be exceptions in this scenario. | The platform potentially only has partial access to all visits. This approach allows ad blockers to function normally. This prevents the platform from capturing all of a website's traffic. |
| Custom domain setup required in Platform? | Yes | Yes | No |
| Setup Complexity? | Medium. Configure a proxy to forward requests via a NGINX configuration. | Low. Create CNAME DNS Entry. | None. No changes required when using the platform's default setting. |
In order to have access to all your visitors/traffic and be able to provide the best security for your website’s visitors, we recommend using the same domain in your tracking snippet as your website and configuring a proxy (via NGINX) to forward all requests as shown here.
The second best option is to use a sub-domain of your website within the tracking snippet and configure a CNAME DNS entry by following the instructions shown in the dashboard after setting up the custom domain.
Same Domain as Website
To bypass ad blockers, a proxy can be set up on the domain serving the website. This allows all data to be sent from the browser via the same domain, for example to prevent or significantly reduce the blocking of the domain by ad blockers.
To get this working, you'll need to make the following changes:
- Update your NGINX configuration to correctly forward all requests.
- Update the TWIPLA snippet to work in Proxy Mode.
Important Note: This approach only works technically when using our standalone solution (it is not possible with TWIPLA plugins).
NGINX Configuration
The following needs to be added to the nginx config:
server {
   [...]
   #TWIPLA
   location ~ ^/analytics {
         proxy_pass       proxy.twipla.com;
         proxy_http_version 1.1;
         proxy_set_header Upgrade $http_upgrade;
         proxy_set_header Connection "upgrade";
proxy_read_timeout 1h;
proxy_ssl_name "proxy.twipla.com";
proxy_ssl_server_name on;
proxy_ssl_protocols TLSv1 TLSv1.1 TLSv1.2;
proxy_ssl_session_reuse on;
proxy_buffering on;
         proxy_cache_revalidate on;
         proxy_pass_header Set-Cookie;
         proxy_set_header X-Real-IP $remote_addr;
         proxy_set_header X-Forwarded-For $proxy_add_x_forwarded_for;
         add_header X-Cache-Status $upstream_cache_status;
         add_header       X-Served-By $host;
         proxy_set_header Host "proxy.twipla.com";
         proxy_set_header X-Forwarded-Scheme $scheme;
         proxy_set_header X-Forwarded-Proto  $scheme;
         proxy_set_header X-Forwarded-For    $remote_addr;
         proxy_set_header X-Real-IP          $remote_addr;
         gzip on;
         gzip_vary on;
         gzip_proxied any;
         gzip_comp_level 6;
         gzip_types text/plain text/css text/xml application/json application/javascript application/xml+rss application/atom+xml image/svg+xml;
       }
}
TWIPLA Snippet Configuration (NGINX Approach)

After setting up your NGINX configuration, the next step is to update the tracking snippet on your website.
For example, your website domain is your-website-domain.com/analytics. If you're using the same domain, the entire URL within the snippet ('//app-worker.visitor-analytics.io/main.js') should be changed to ‘/analytics/main.js’.
Note: Your websiteKey should remain unchanged.
You can view a live example of the integration here.
Subdomain of Your Website

If you are using a subdomain of your website or a different domain than default, the tracking URL within the snippet ('//app-worker.visitor-analytics.io/main.js') should be replaced with the domain you used.
For example, you're using the subdomain, analytics.your-website-domain.com, the URL should be changed to ‘analytics.your-website-domain.com/analytics/main.js’.
How To Configure CNAME DNS Entry

To set up a Custom Tracking Domain (via a CNAME DNS entry), follow these steps:
- Navigate to the Customize Domain in Snippet to Avoid Traffic Loss section.
- Enter the custom domain for the tracking snippet and click Save Changes. For this example, we're using the subdomain, analytics.your-website-domain.com.
- The Confirm Snippet Domain Change modal will appear with the required DNS details. To verify your newly added custom domain, you need to add the CNAME record (details below) displayed on the modal with your domain registrar or DNS provider:
- Type: CNAME
- Hostname: @
- Value: geo.hostedby.net.
- Once the DNS record is correctly configured, the platform will automatically verify the setup and prepare everything needed. This process may take anywhere from a few minutes up to 24 hours — click Verify DNS to continue.
After completion, the platform will start tracking on the custom domain.
Choose from Three Installation Options

For Standalone or HTML Websites
Our analytics tools are compatible with all website builder platforms. Before manually integrating the tracking code, check whether an installation guide is listed further down this page. But if you are either unable to find your platform or are running a standalone website, follow the installation steps below to manually add the tracking code to your webpages:

Step 1: Sign In
Sign in to your analytics account or create an account if you're new.
Step 2: Navigate to [Add new website]
New sign ups will be automatically funneled into the onboarding process, which includes adding the tracking code (or instructions do to so) to their (first) website.
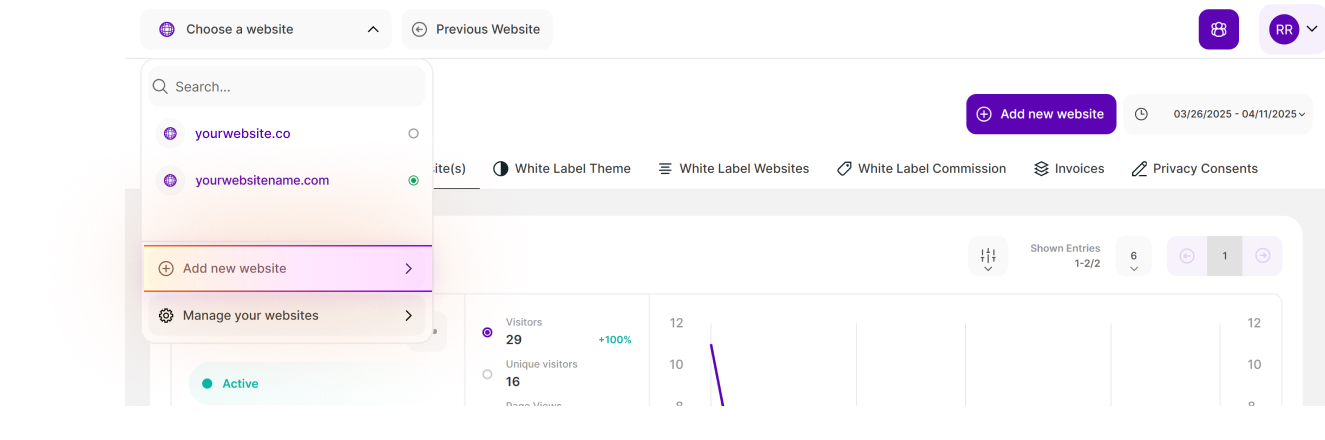
Existing users can activate this installation process for a new site by:
Clicking on the in-app website dropdown selector in the upper left corner.
Choosing [Add new website].

Step 3: Add the website URL
Select the [No, I Don't Use Any Platform From Above] option and paste in your website homepage URL.
We recommend that you copy this from your browser's address bar to avoid making a mistake.
We also advice that you don’t include the protocol, and just copy the URL from “www” onward (leaving out the HTTP/HTTPs scheme at the beginning).
Step 4: Copy the Tracking Code
After selecting the data privacy mode for your website, choose between two tracking code options: [NO Visitor Consent Needed for Tracking(Recommended)] or [Visitor Consent Needed for Tracking (Platform NOT SET to Max Privacy Mode)]. Read the installation instructions for each option.
Use the [Copy] button to avoid having to save the tracking code by hand or missing out any characters.
Note: If you need to install the tracking code on one of your other account websites, you can find it in the [Manage Account Website(s)] section of [Account Settings].
Step 5: Paste tracking code into webpage source code
The tracking code will need to be pasted into the source code of each page that makes up your website.
This can be done by opening up the webpage index file, which contains the relevant source code. If you can't access these files, then you may need to ask your website hosting provider for access.
These index files can normally be found in your file management folder, but the exact location will be different from website to website.
Then, drop in the tracking code. It needs to be pasted right before the closing </body> tag, near the bottom of the index file. Don't forget to purge the cache and publish changes afterwards.
The tracking code is lightweight (around 30 KB compressed) and loads asynchronously, so it won’t block content, slow down your site, or affect how it appears in search engines regardless of the tools you activate (including heatmaps and session recordings).
Note: The tracking code is the same for all pages that make up the website, and it can always be found in the [Manage Account Website(s)] section of [Account Settings].
![]()
Save Time by Adding the Snippet to Template Files
To avoid manually adding the tracking code to each page, you can instead add it to the head, header, or footer template source code.
However, this will only work if the element is automatically loaded on to each new webpage on creation.

Step 6: Verify Snippet Installation
Return to the analytics platform to confirm that the tracking code has been installed correctly.
If so, the tracking code status will appear green. You can find this in the [Tracking Code] section of [Website Settings], which is in the vertical left-hand navigation menu.
You can further verify snippet installation by reloading the dashboard after visiting your live website to see this visitor data displayed.
For Sites Created Using a Website Builder
If you're using one of the following platforms, we recommend referring to the linked installation guide for step-by-step instructions:
Other Platforms
We're constantly working to improve the tracking code installation process for all website builder platforms so watch this space for updates!
For Websites Using Google Tag Manager
For users implementing Google Tag Manager (GTM), comprehensive installation instructions can be found in our dedicated guide.
Getting Started with Analytics
Once the tracking code is installed, you can start using all the analytics tools.
Have a read through some of the guides below to learn how to get the most out of them:
What Are Heatmaps? The Only Guide You Need
What Are Session Recordings and How to Get the Most Out of Them
What Are Conversion Funnels? A Guide for Digital Marketers
The Complete Guide to Getting the Fundamentals of Your Website Right
How to Use Website Surveys and Polls to Boost Your Digital Marketing Activities