
- First Steps Checklist
-
Frequently Asked Questions

-
All About Features
- How to Install the Tracking Code
-
User Guides
-
Integrating With Other Platforms
-
Legal, Data Privacy & Certificates
- TWAIA Addendum
- White Label Analytics
- Glossary
- Contact
TWIPLA for Google Tag Manager
How to install TWIPLA via Google Tag Manager
We are now part of the GTM (Google Tag Manager) community. You can add TWIPLA to your website directly through GTM.
For a detailed step-by-step guide on how to easily install TWIPLA via Google Tag Manager, go to your Tag Manager account and refer to the installation guide listed below:

Tag Template Search
1. Go to Templates from the left-side menu and click Search Gallery under the Tag Templates card.
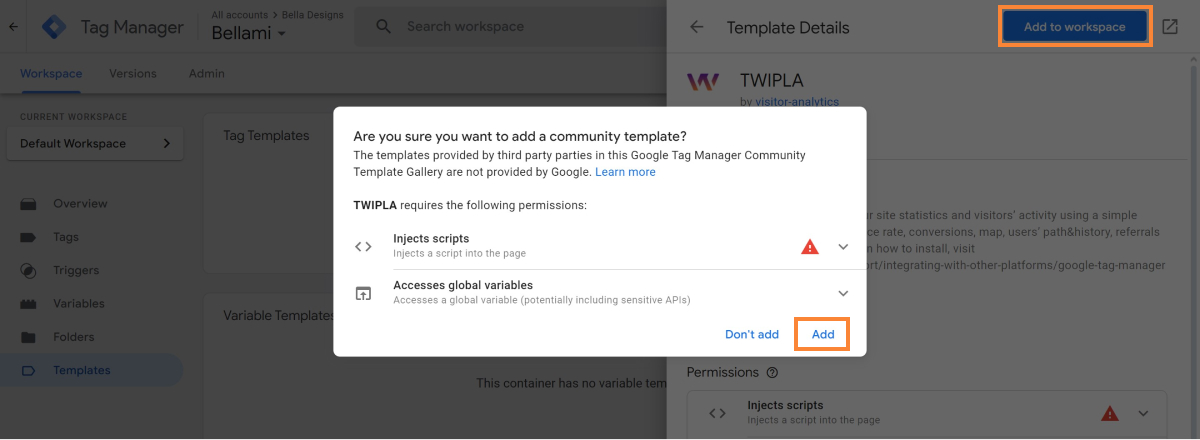
Add TWIPLA template to Workspace
2. Find the TWIPLA template and click Add to workspace.
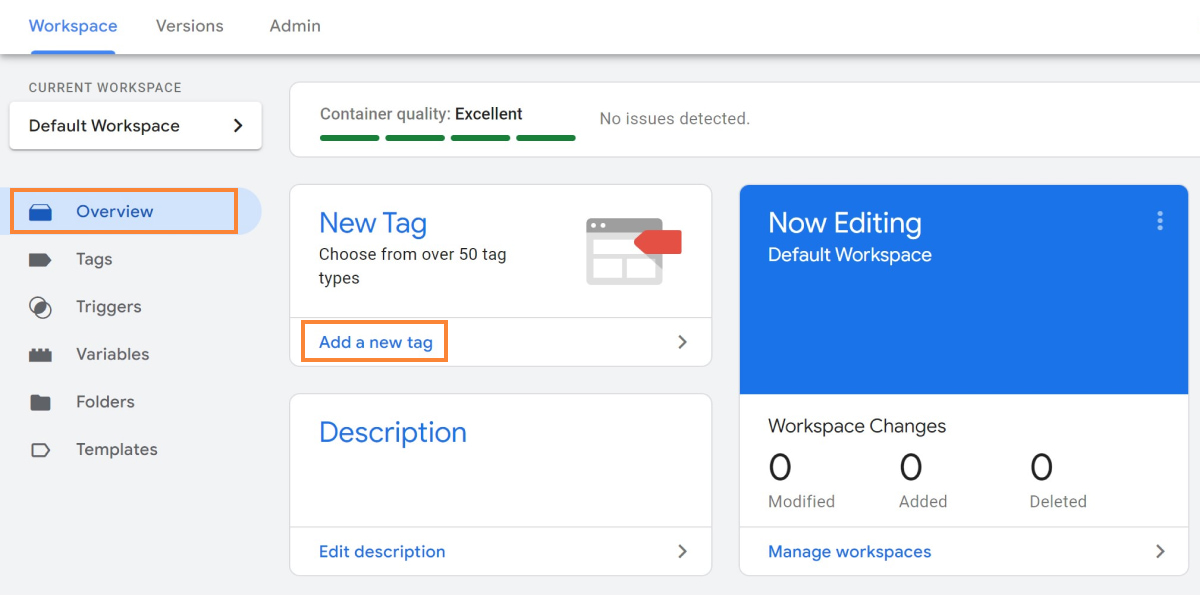
Add New Tag
3. Go to Overview and click Add a new tag (or go to Tags and click on New).
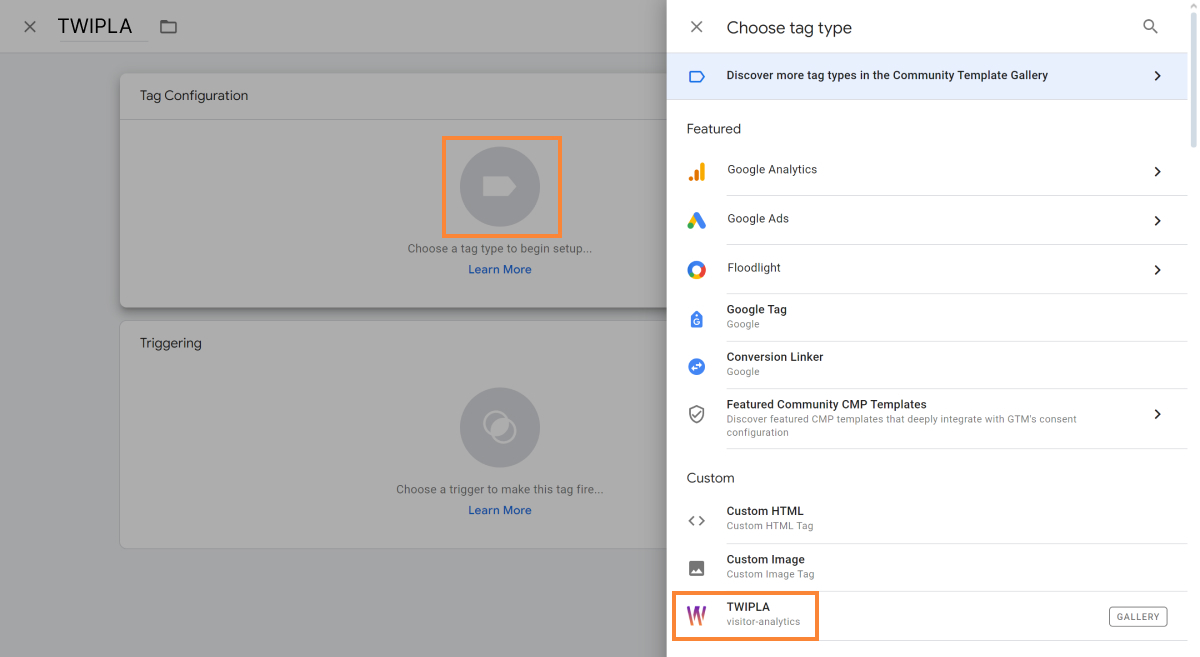
Select the TWIPLA tag
4. Select the Tag icon and choose TWIPLA from your list.
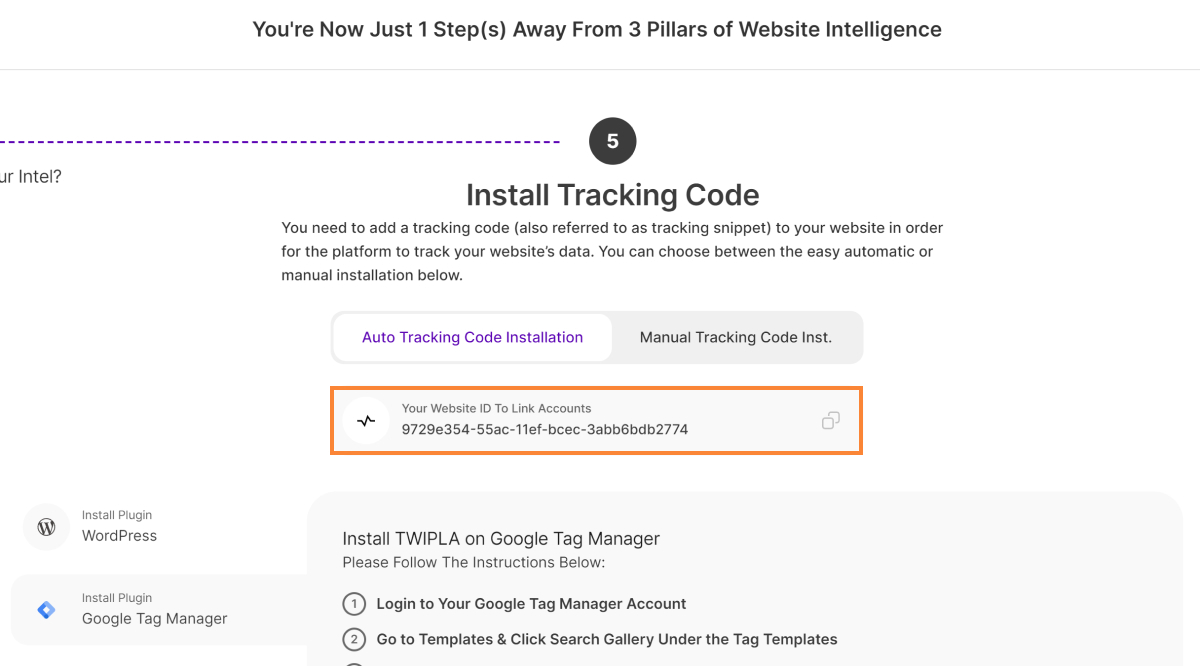
Copy Website ID
5. Go back to installation screen in our app or navigate to Website Settings > Tracking Code (if you chose to install it at a later time). Copy your Website ID.
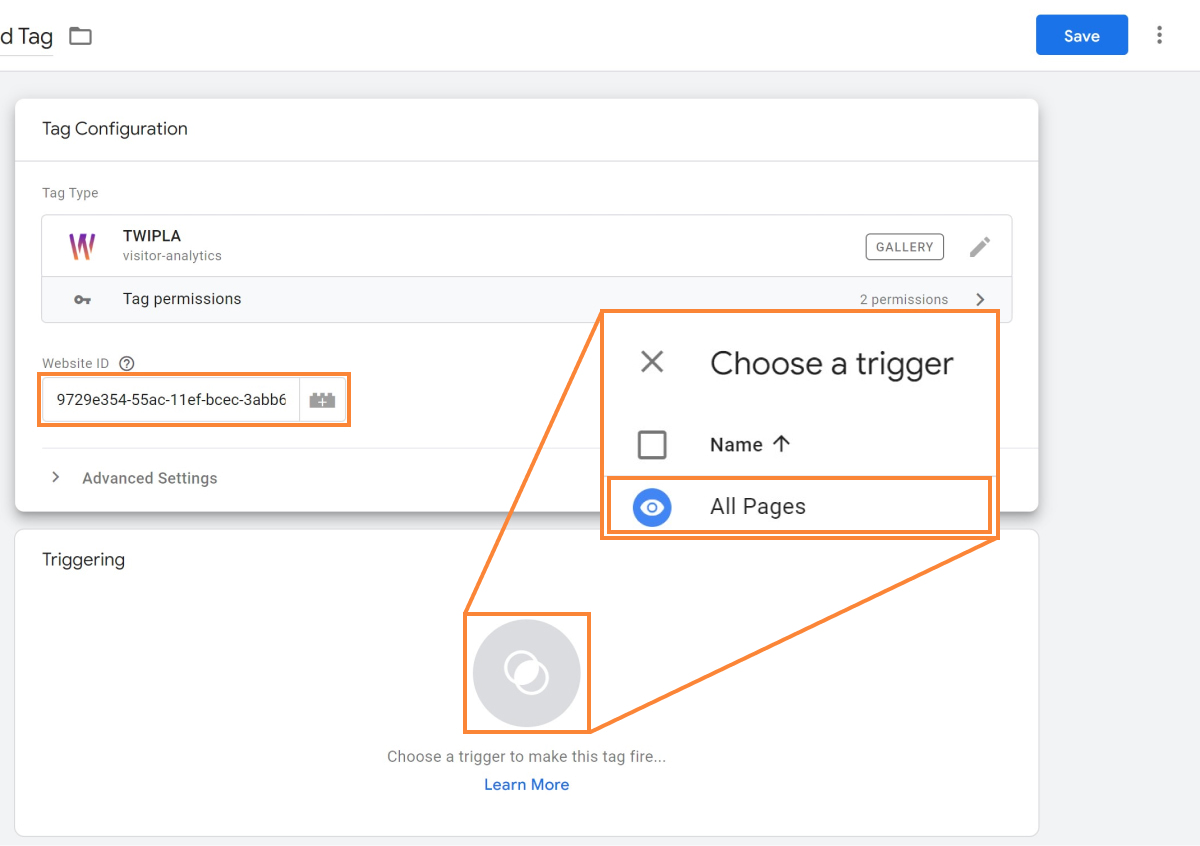
Setup the Trigger
6. Go back to your tag and place it in the Website ID field. Set up a trigger selecting the Triggering icon and only choose the option named All pages. Click Save.
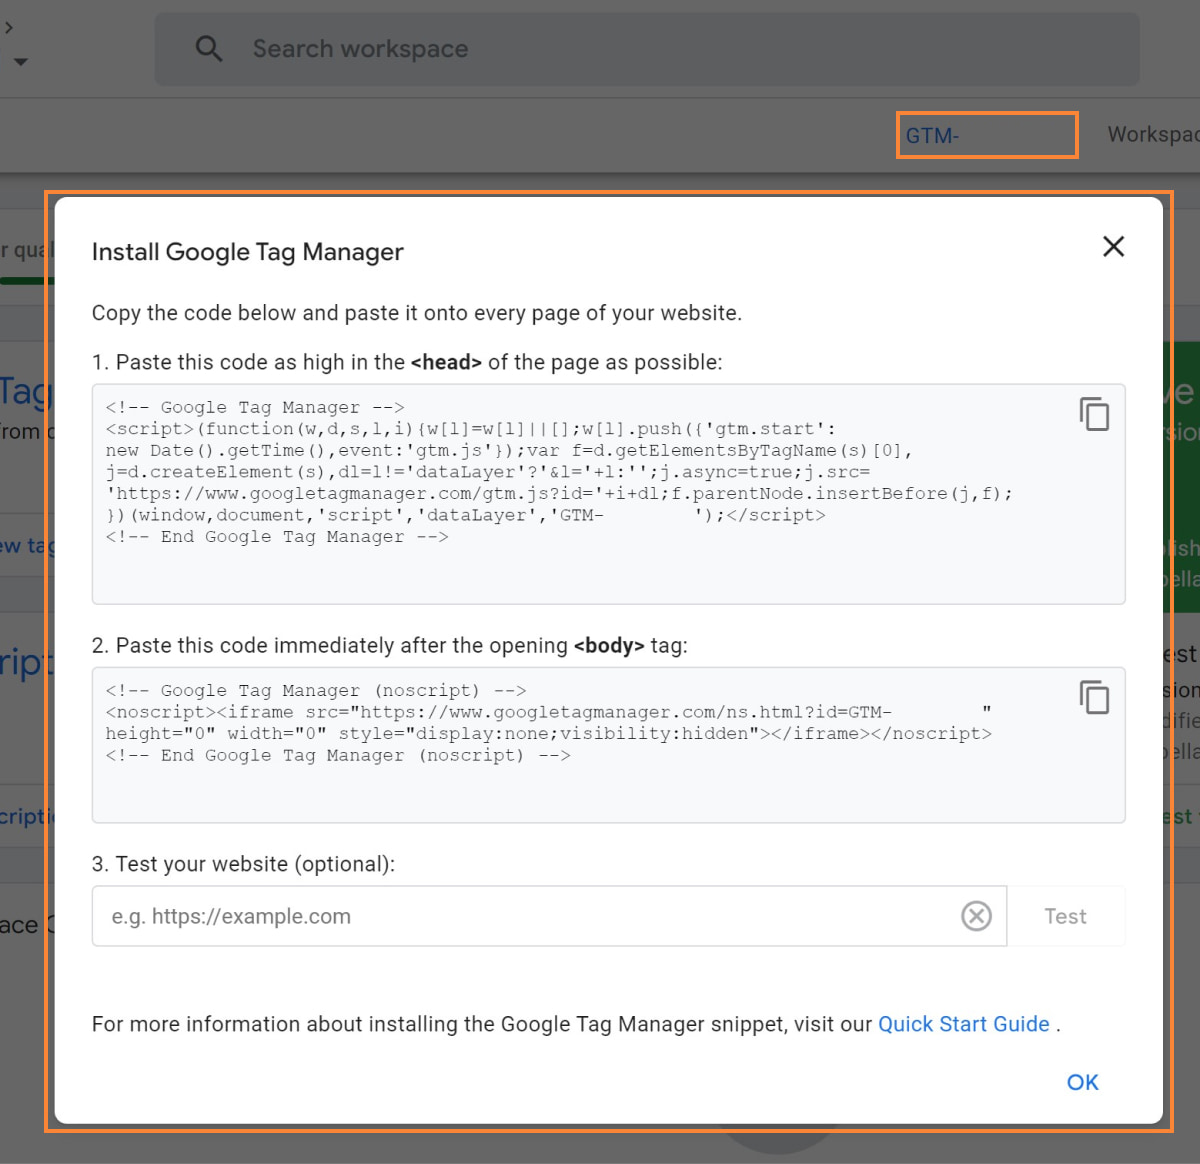
Add Codes to Website
7. Copy and paste these codes into the header and footer of your website's source code. Save and publish on your website!

Submit Changes
8. Click Submit to apply all the changes.
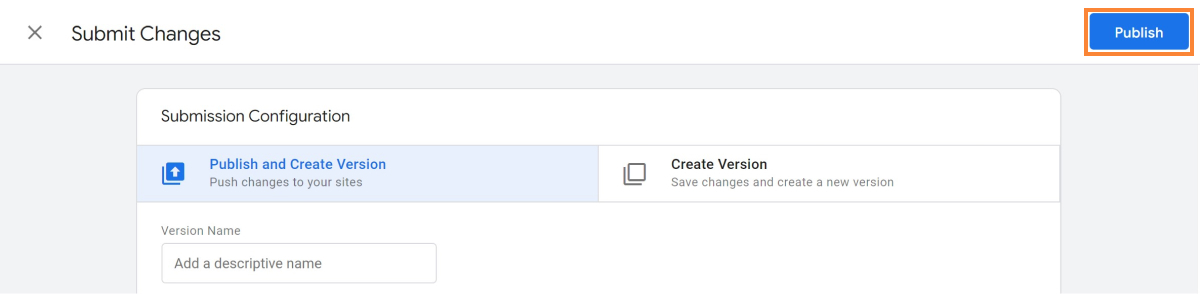
Publish Version
9. Select Publish and Create Version, then hit Publish to push the changes to your site.
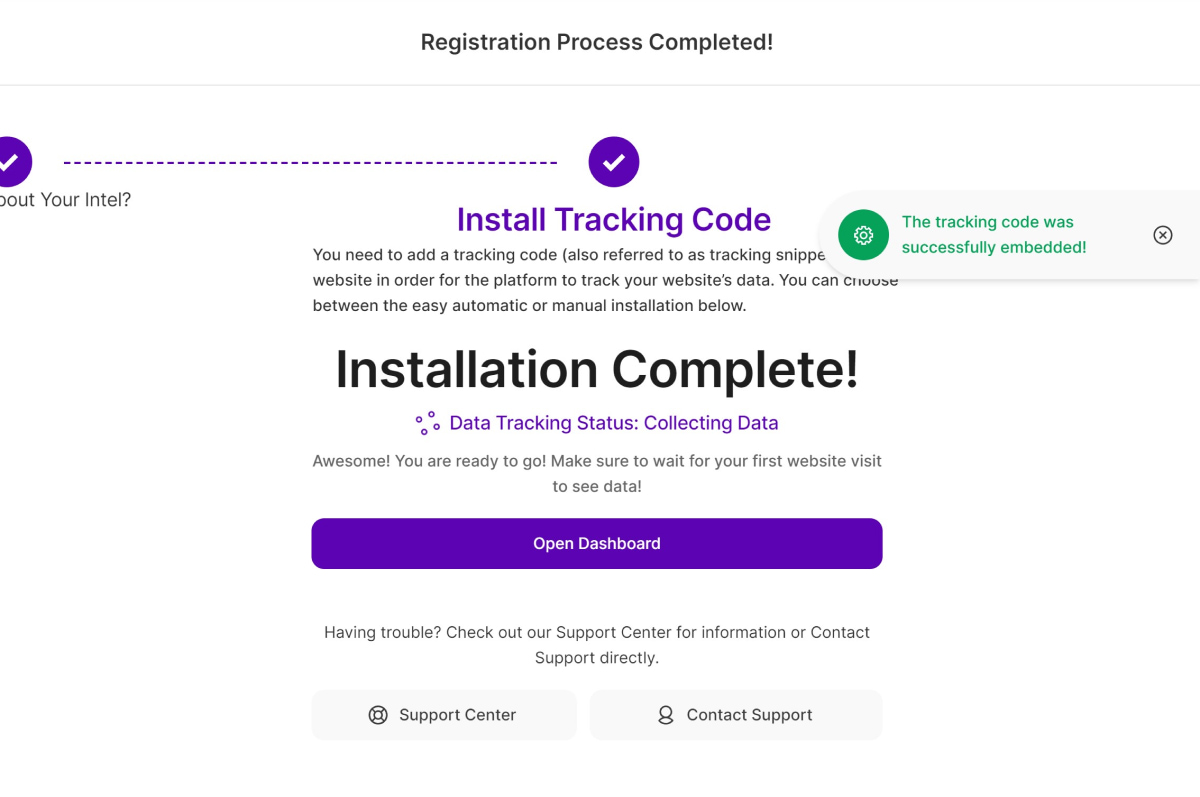
Verify Snippet Installation
10. Go back to our app and click Verify Snippet Installation. Once successful, a message will pop up on the right of the screen saying, "The tracking code was successfully embedded!". If you get the message, "The tracking code could not be found in the body section of your website's source!", check your website's source code to make sure that the tracking code was installed correctly.
You are all set! You can now check your website statistics at any time. Return to your TWIPLA account and go to your Main Dashboards to view your first stats.
Support for Installation and Using TWIPLA via Google Tag Manager
If you encounter any issues during installation, you can reach us through:
- Email: Send us a message at support@twipla.com.
- Chat Bubble: Use the chat bubble available on our website.
- In-App Support: Access support directly within the app.
For additional details, please visit our Contact Us page. We are committed to ensuring a smooth and seamless experience with our plugin!